18 november 2014

De programma's BeursKoersen, EffectenBeheer en EditPhotoInfo zijn verhuisd.

Omdat Ziggo in Twente van de kabel gehaald wordt, kan ik geen gebruik meer maken van de Ziggo server waar bovengenoemde programma's op stonden.

Ik heb deze programma's nu op mijn server bij Strato gezet, maar daardoor werkt de automatische update niet meer. U moet daarom deze programma's opnieuw installeren vanaf mijn Software Download pagina.

De laatste Windows software versie doet er alles aan om te voorkomen dat U mijn programma's installeert, U krijgt heel wat waarschuwingen te zien, maar op mijn weblog heb ik aangegeven wat U moet doen om de software toch geïnstalleerd te krijgen.

Als U een programma opnieuw geïnstalleerd heeft, dan krijgt U bij een volgende versie wel weer een automatische boodschap waarin aangegeven wordt dat U een nieuwe versie kan installeren.

De wijzigingen in de programma's zijn niet groot:

Wijzigingen in BeursKoersen versie 3.4.8.5

De RBS Turbo website is uit de lucht gehaald en daarom uit dit programma verwijderd. Op de oude Turbo website positie kunt U nu een Alex website openen, maar er kunnen geen koersen opgehaald worden. U kunt er wel een Excel file van uw portefeuille maken en daarmee de koersen in het EffectenBeheer programma importeren.
Als U het programma start, ziet U altijd de Intraday website.

Wijzigingen in EffectenBeheer versie 4.3.3

Probleem met de import van Behr Datum/Koers files opgelost.
Probleem met de import van EuroInvestor csv-files opgelost.
Het is nu mogelijk om de koersen van een Alex Zelf Beleggen portefeuille over te nemen via een Excel file.

Wijzigingen in EditPhotoInfo versie 4.2.6.2


"&output=classic" toegevoegd aan Google Maps link.

De ClickOnce installatie methode

Mogelijke problemen bij een installatie:
Als er na een automatische update een foutmelding gegeven wordt, dan moet U de oude versie eerst verwijderen via Start / Configuratiescherm / Programma's en onderdelen. Installeer daarna de nieuwe versie vanaf het installatie scherm.
Soms lukt de installatie niet als U de Internet Explorer gebruikt. U kunt dan het t beste een andere browser programma gebruiken: Google Chrome, FireFox, Safari of versie 8 van de Internet Explorer, want die programma's geven geen problemen.
_________________________________________________________________________________
Mijn programma's zijn gemaakt met Microsoft Visual Studio Express 2013, dat gebruik maakt van de nieuwste versie 4.0 van het Microsoft .NET Framework. Alle nieuwe versies van de programma's die U van mijn website kunt ophalen zullen daarmee gemaakt worden. Ik gebruik de installatie methode ClickOnce.

De ClickOnce technologie is een onderdeel van het Microsoft .NET 4.0 Framework. Op alle PC's waar U mijn programma's wil draaien moet die versie aanwezig zijn. De QlickOnce installatie methode zal als het NET 4.0 Framework installeren als het nog niet op Uw systeem staat. Desgewenst kunt U die versie ook zelf vooraf installeren vanaf de Microsoft download pagina, waar U ook de beschrijving en de systeem eisen kunt vinden.

QlickOnce zet het programma niet meer in een map onder de “Program Files”, maar in de ClickOnce applicatie cache. Waar dat precies is kunt U vinden door in het geinstalleerde programma op de Info pagina (Help/Info..) te kijken:


Als U de muiscursor boven de onderste regel houdt, dan ziet U een geel venstertje met de volledige naam. Er wordt ook niet meer een Data map gemaakt onder "Mijn Documenten/WolffSoftware".

Om een programma te installeren gaat U naar mijn download
pagina
en opent U de tab van het programma dat U wil installeren. Klik daarna op: 'Open de installatie pagina', U ziet dan bijvoorbeeld voor mijn programma BeursKoersen::


U start de installatie door op de knop 'Install' te klikken.

Soms lukt de installatie niet als U de Internet Explorer gebruikt. Ik heb dat probleem bij Microsoft aangemeld, dus mogelijk krijgt U hier een oplossing te zien. Als Microsoft nog geen oplossing heeft kunt U het beste een andere browser programma gebruiken: Google Chrome, FireFox, Safari of versie 8 van de Internet Explorer, want die programma's geven geen problemen.

Omdat mijn programma's niet zo vaak als Microsoft programmaa's gedownload wordt, worden er allerlei waarschuwingen gegeven:


Klik op het pijltje naast Annuleren en selecteer 'Behouden', waarna het beeld wordt:


Klik daarna op setup.exe en selecteer 'Openen'. U kunt setup.exe ook eerst downloaden en daarna de gedownloade file openen. Helaas komt er dan meestal weer de volgende waarschuwing:


Klik hier op 'Meer informatie', waarna U ziet:


Klik nu op 'Toch uitvoeren'

Eerst controleert de installatie methode of het .NET Framework 4 op U systeem aanwezig is. Als dat niet het geval is dan wordt het automatisch opgehaald vanaf de Microsoft site en geïnstalleerd als U accoord gaat met de licentie voorwaarden:


Nadat de nieuwe .NET versie geinstalleerd is kan het systeem opnieuw opstarten of kunt U een melding krijgen die er ongeveer zo uitziet:
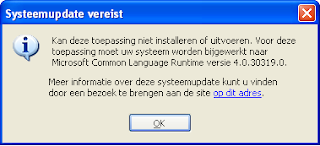

of zo:


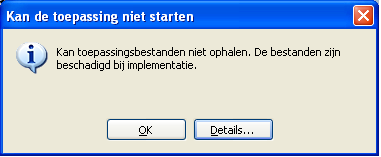
Ik denk dat dit bugs in de ClickOnce software zijn (zie het ClickOnce forum), druk in beide gevallen op OK en start de installatie procedure opnieuw op nogmaals op de knop 'Install' te klikken.

Als de Framework installatie al op de PC stond, dan begint de installatie van het programma direct:


Ik heb geen duur certificaat gekocht, U moet me maar vertrouwen, dus klik op de knop 'Installeren'.
Daarna komt de waarschuwing die U al eerder heeft gezien:


Klik weer op de link 'Meer informatie' waarna U ziet:


Klik hier weer op 'Toch uitvoeren'.


Als het programma de eerste keer opgestart wordt dan moet U eerst mijn licentie voorwaarden accepteren:


Als U niet op de Ja (OK) knop drukt, dan wordt het programma direct afgesloten en ziet U dit venster weer bij een volgende start. Als U wel op de Ja(OK) knop drukt, dan blijft dit scherm bij een volgende start afwezig.

Een programma waarvoor een licentie file nodig is (momenteel alleen voor BeursKoersen en Effectenbeheer) wordt de eerste keer altijd in de Demo mode opgestart. Als U een licentie file ontvangen heeft, dan kunt U die beperking opheffen door dit in het volgende scherm aan te geven:


Nadat U op de ja knop gedrukt heeft moet U navigeren naar de ontvangen file 'Beleggen.dat', waarna deze file gekopieerd wordt naar de programma map. Klikt U op de Nee knop, dat ziet U de Helpfile waar aangegeven is hoe U aan de licentie file kan komen.


Als ik een nieuwe versie op mijn download pagina gezet heb, dan wordt U geattendeerd op de nieuwe versie:

14 oktober 2014

Web page support with the FancyBox, the PhotoSwipe and the Slide Show 4 skin

In version the Slide Show 4 skin, in the FancyBox skin and in the PhotoSwipe skin it is possible to add extra web-pages in the standard jAlbum way as has been described in this blog

This note will explain how these pages are added to a photo album made with the jAlbum program where these skins are used.

To add an extra page, click with the right mouse button in the jAlbum Explore and select item 'New page':

Select one of the 4 possible types of pages:
About.htt, About_album.htt, Contact.htt, Map.htt and Empty_page.htt.

Don't select the 'Empty page' item on the first line of the New page pop-up menu!

After adding a page, add a title to the page, by selecting label type Title in the upper right corner of the jAlbum Explore and enter the title below the icon of the new page. This Title will be showed as link to the new page in a top menu bar, see the Slide Show 4 sample album.


About.htt page


The About.htt page is inspired by the Base skin. To use it, create a new About.htt page with the right mouse button in the jAlbum Explore and click on the Edit text of the new page icon. The about.htt page is opened:


If you like to show an author image or company logo on the about page, click the Select button and browse to the image you like to use.
Enter the image width you like to use in the next textbox. If you leave this field empty, the natural width of the image will be used.

If you like to use a title above the contents of the about text, enter your title in the Header field. You can leave that field empty, because you see also the title you have given in the jAlbum Explorere in the menu bar.

Enter the contents of the page via copy and paste in the next Text field. 

The contents of the page is best edited first in a text editor or even better in a html editor. 

For those who are not familiar with html code, I give here part of the text I used to compose the 'About me' page used in the Slide Show 4 sample album:

<p>Hi, I am André Wolff. </p>
<p>I was 30 years active in the software development for Philips in the Netherlands.</p>
<p>To keep my brains active, I spent after my retirement still some time in software development, but now for my hobbies: 
<a href="http://www.andrewolff.nl/FotoSerie/fotoindex.htm" target="_blank">digital photography</a> </p>

A paragraph of text should be surrounded by <p> and </p> tags and just a carrriage return/linefeed is made by a <br> tag.

A link to another web-page should start with <a href="Address_of_the_page" target="_blank"> followed with the text of the link followed by </a>

That is all the html knowledge required to compose the contents of the About.htt page and the other pages.

To see the about page made in this example, click here. The background, text colour etc. of this and all other template pages is determined by the Slide Show 4 skin style and settings.


About_album.htt page


The About_album.htt page is made in the same way as the About page, you can if you like add a centered image at the top of the page. This image is displayed above the text, with the same border as used for a possible theme image in the album. 

If you set the width to 100%, the image will be stretched so that it fills the whole page width.

Click here to see in the 'About this album' page of the Slide Show 4 sample album.


Contact.htt page


The Contact.htt page is inspired by the Turtle skin. If you click the Edit text of  the Contact.htt icon, the next page is opened:


As with the previous page, you can again select an image to be displayed at the top of the page and you can add an optional Title in the Header field.

The next fields are only displayed if you enter text in these fields.

You can define the prefix for the address, in this example 'My home page'. You can do that to for your web-site, in this example 'My home page'.

Click here to see the contact page of  the Slide Show 4 sample album made in this example.


Map.htt page


This page can be used to present a map where the photos in the album have been made. The locations of the photos should have been recorded as waypoints in a Google Earth kml file.

This note describes how to make such a kml file.

If you click the Edit text of  the Map.htt icon, the next page is opened:


You see the instructions to make a map page on this form. The Map page displays the contents of a Google Earth KML file (the KMZ file is not supported).

For the Slide Show 4 skin, you can make the KML file with my program EditPhotoInfo according to the instructions in the helpfile

The KML file is created in the output directory of the album,  for instance for the sample album:
http://andrewolff.jalbum.net/Vecht_Stegeren/map.kml

If you display the map in the Map.htt web-page, you can delete the optional GoogleMap.html page made in the output directory, however if you uses the Google Maps button defined on the Slide Show 4 links tab, you should enter the text 'GoogleMap.html' in the URL field after 'Open Route in Google Maps:'.

If you have a Google Maps Javascript API key, it is advised to enter that in the first text-box, but you may leave this text-box empty. Next select the type map style and finally enter the URL of the KML file. 

Next create the album and upload it to the server. A local preview will show no map, unless the KML file is already uploaded.


Click here to see this Map page in the Slide Show 4 sample album or click on the link 'Map' in the menu bar to see the map.


Empty_page.htt page


The Empty_page.htt page is made in the same way as the About_album page, without an image. This page is editted by a html editor in the sample album, to see the result, click on the 'More Slide Show 4 info and examples' link in the Slide Show 4 sample album.


Show other links in the menu bar


The menu bar is automatically created if you add one or more web-pages as described above. If the album contains also folders, the extra web-pages are only visible in the menu of the top (parent) album.

However you can use the menu bar also without extra pages to show the links defined on the links tab by setting check-mark 'Show these links in the menu bar':

As an example see my Hameln album

These links are only displayed in the menu of the top (parent) album in case folders are used, unless you set check-mark 'Show these links too in folders'.

If you have already a menu bar due to extra web-pages, these links are added after the links to the extra web-pages.

If the album contains folders, it is also possible to show the folder titles in the menu bar by setting check-mark 'Show links to folders in the menu bar' on the index page tab:

As an example see my Terschelling album

This example shows all links in the menu bar:

The link to the GoogleMap.html page made by program EditPhotoInfo is is also valid for the folder albums if such a GoogleMap.html file is also created for the kml file in the folder directory.

Click here  to download and install the newest version of the Slide Show 4 skin and click here to open the Slide Show 4 skin manual. 


How to add a map to a Slide Show 4, the FancyBox or the PhotoSwipe album


If your photos contain GPS coordinates, the longitude and latitude where the picture was taken, then you can use this to show in a map where the photo was taken. That's possible with  Google Maps or Google Earth. This  note will explain how to add such a map to a photo album  made with the  jAlbum program where the Slide Show 4 skin, the FancyBox skin or the PhotoSwipe skin is used.

First you have to add the GPS coordinates to the EXIF data block in the JPEG file containing your photo.

If your camera has a GPS receiver, the GPS coordinates are added automatically, so that is the easy way. Most mobile phones contain a GPS receiver, so if your photo has been made by the Camera App on an iPhone, your photo contains the GPS coordinates it can be be displayed in a map.

If you have no access to a GPS receiver, you can add the GPS coordinates manually to your photo.

If you process your photos with the Adobe Lightroom program, select the photo where the GPS data should be added and select the Map tab:

Next click with the right mouse button on the location where the photo has been made and select 'Add GPS coordinates to Selected Photos'.

You can also do this with the Picasa 3 program. Open the right Locations sub-window, select the photo where the GPS coordinates should be added and click the green balloon in the Locations sub-window and next click in the map where the photo was taken:

You can do this too in Google Earth by selecting in Picasa menu item Extra > Geotag > Geotag with Google Earth.

Do you use a a separate GPS receiver, like the Garmin GPSMAP 62st which I use,  to record the track in a track log file when you make your photos, you can use that file to fetch the GPS coordinates.

With a GPS receiver, you can see what the coordinates (latitude and longitude) of the place are where the picture is made. Most GPS receivers can, while walking or cycling a route, save the track in a track log file. The GPS stores than from points where you have been, the time, longitude and latitude in the track log file.

If you take a picture, the camera saves the recording time in the EXIF data of the photo. At the same time the track log file saves the longitude and latitude of the camera position with the recording time. This is later used in my program EditPhotoInfo to store the position in the EXIF data block of the photo.

Download and install program EditPhotoInfo from  my download page and start this program:

By clicking the 'Open' button you will get an open file window where you can select a the JPEG file of a photo. You must do it in the directory where the photos are which you did make while recording the GPS.

Next click  the Tracklog button in the 3th panel. You will see an open file window. Select your track log file with the extension .gpx corresponding with the photos in the photo folder. After you have pressed the OK button the locations are automatically added to the photos.

If the location of an image is found you will see it in the right window for example:
'DSC1023.jpg '-> Exif Time: 5/1/2009 15:28:59, Track Log Time: 5/1/2009 15:29:09, Lat: 37.317993, Lon: -7.581656

DSC1023.jpg is the filename of the picture. Exif time the recording time from EXIF data. The Track Log Time is the time of a point from the track log file that was closest to the recording time. The number after 'Lat' is the latitude in decimal degrees (negative for southern hemisphere). The number after 'Lon' is longitude in decimal degrees (negative for points west of Greenwich in London).

If no position is found where you see the following message:
No GPS loc. 2009:01:05 15:33:26 for time out 'DSC1024.jpg' in the track log file.

You will receive notification if the GPS was off when the recording was made or if the clock in the camera synchronized with the time that the GPS system.
In the latter case you can correct it by entering in text box 'Camera time - GPS time (sec) ' the time difference, next you click again the track log button.

You can read the track log file also with the Adobe Lightroom program on the Map tab via command 'Load Tracklog...'. Next select the pictures to be tagged and select command 'Auto -Tag x Selected Photos'. 

After the GPS coordinates have been added to your photos, you can make the Google Earth kml or kmz file. You can make a simple Google Earth kmz file with the Picasa 3 program, but if you use the Slide Show 4 skin, it is better to use my EditPhotoInfo program where the creation of the KML-file has been described in the helpfile.

To make the Google Earth file in Picasa 3, select all photos to be included in the kmz file. Next click menu item Extra > Geotag > Export to Google Earth file and save the file as map.kmz in the output directory of the album. 

Suppose the name of the output directory is
“D:\Users\Andre\Documents\Mijn websites\jalbum.net\Gravenallee_Picasa”
and this will be uploaded to
http://andrewolff.jalbum.net/Gravenallee_Picasa/.
The URL of the Google Earth file map.kmz is in that case
http://andrewolff.jalbum.net/Gravenallee_Picasa/map.kmz

Construct now the Google Maps search string by adding the prefix
https://maps.google.com/maps?q= and the postfix &output=classic
Enter in the URL field of 'Open Route in Google Maps' this search string for Google Maps:
http://maps.google.com/maps?q=http://andrewolff.jalbum.net/Gravenallee_Picasa/map.kmz&output=classic 
and in URL field of 'Open Route in Google Earth' map.kmz
Next click in jAlbum the 'Make album' button and upload the album. 


On this Google page is stated:
From February 2015, maps created in the classic Google Maps —https://maps.google.com/— will no longer load KML/KMZ files from external websites. 

So Google Maps links created above are no longer valid. The new method uses the Map Engine in the following way:

Open Google My Maps and click the 'Create a new map' button.

Click the Import link in the upper left corner and drag the kml file with way-points into the window.
If you like to add a track, click the 'Add Layer' button and drag the kml file with the track into the window.

Next click the green Share button in the upper right corner and enter the Map title and description.
Click he Save button and the 'Change...' link in the next window.
Select option 'Public on the web' in the next window and click the buttons Save and Done.

In the address field of the browser you see now the link to the created map. If you use the PhotoSwipe or Slide Show 4 skin, you can copy that URL to the URL field behind 'Open Route in Google Maps:'.

You can also make a map with my new program MakeMap. The method has been described in the MakeMap helpfile. This program generates a map.kml and an optional GoogleMap.html file in the jAlbum root directory. After the creation of this files, you have only to set the links to these files on the Links tab:


To create a Slide Show 4 Map.htt page, add a Map.htt page in the jAlbum Explorere and Edit that page:


If you have a Google Maps Javascript API key, it is advised to enter that in the first text-box, but you may leave this text-box empty. Next select the type map style and finally enter the URL of the KML file. Next create the album and upload it to the server. A local preview will show no map, unless the KML file is already uploaded.

You see the result hereClick on the Map link in the menu-bar, to see the map in your browser. Click on the Google Earth link to see the map in the Google Earth program. 

If you click in Google Maps on a small thumbnail in the map, the picture is enlarged:

If you make the Google Earth file with my EditPhotoInfo program, you see the next window in Google Maps if you click now on a purple camera icon:

If you click now on the image, the corresponding slide page is opened.

To see that album click here

I made a new program MakeMap to generate the mnap in an even easier way, see the Mapmap helpfile for more information.

To make the Google Earth kml file in program EditPhotoInfo, open that program and click on the Options button in the upper right corner:

The first panel allows you to set the properties of the map and of the picture shown the pop-up window you see if you click on a purple camera icon, see above.

The information in the panel 'Local and Server site' is used to create the Google Earth kml-file. The 'Local map' is the folder on your PC with the start file of your web site. (the root directory). Use the Browse button to select this folder. The 'External URL:' is the Internet address of the corresponding folder on the server.

Close the Options window and click the 'Open' button in the main window and browse to one of the photos in the jAlbum Image directory. Next check in panel that says 'Google Earth kml-file' the check-box to use photos of the website.

Click now on the 'Make file' button and browse to the slides directory of the album and double-click on one of the images. A Google Earth file map.kml is made in the jAlbum output directory. 

To open that file  in Google Earth,  click on the 'Waypoints' button and you see the locations of your photos in Google Earth. 

After the album with the kml-file has been uploaded, you can click on a purple camera icon  to open a pop-up window with the photo. Click here  to see an example. The name of the folder for the waypoints can be entered behind 'Waypoints map name:'. 

If you have a  GPS track log file, you can also display it in Google Earth and save it in the same folder as the waypoints file. The combined result can be saved via 'Save Place as' as map.kml file. Click here to see an example in Google Earth and click here to see the same example in Google Maps and click here to see the map made with the Slide Show 4 Mapp.htt template, which uses the Google Maps Javascript API.

Click here  to download and install newest version of the Slide Show 4 skin and click here to open the Slide Show 4 skin manual. 


27 september 2014

The responsive thumbnail gallery for the PhotoSwipe and Slide Show 4 skin.


Up to version 2.3 of the Slide Show 4 skin for the jAlbum program, the thumbnails were displayed in an elastic table, were the thumbnails were reduced in size if the window size was reduced and enlarged if the window was enlarged.

As an example look at the next two screen-shots:

This shows the thumbnails of my Barcelona album on a monitor with a resolution of 1920x1080.

In the album settings we selected here a fixed-sape thumbnail layout of 9 columns and 10 rows, so that all 70 pictures were visible on the screen. The image bounds of the thumbnails was set at 240x160.

If we reduce the window width, the thumbnails will shrink:


This elastic design used in the PhotoSwipe and Slide Show 4 skin is based on the good old html table structure and is works fine on Android tablets, on the iPad and iPhone and on a PC with the Chrome and Safari Browsers. It is not supported by Firefox and by the Internet Explorer.

Try it yourself by opening my Barcelona album with the fixed number of thumbnails per row.

If we display this album on the small screen of an iPhone, the  thumbnail gallery shows as follows:


In the responsive design you can hide the theme image on small devices, what has been done here. You see here all thumbnails on the screen, but in rather small shape. 
You can enlarge the thumbnails somewhat by rotating the iPhone to landscape mode:

It looks better on an iPad:

Up to version 2.3 of the Slide Show  skin you could improve this only by defining in jAlbum a limited number of thumbnails per index page. For instance if we set the number of rows to 3 and the number of columns to 6, we get larger thumbnails on the iPhone:


To see the other thumbnails you have to swipe to the left or click the green right arrow.

In version 2.3.1 of the Slide Show 4 skin and in the newer PhotoSwipe skin, we introduced a second display mode, where the number of  thumbnails per rows is reduced if the area for the thumbnails is reduced.

We selected again a thumbnail layout of 9 columns and 10 rows, and  image bounds of the fixed-shape thumbnails of  120x80.

If we now reduce again the window width, we see first that the number of thumbnails per row is reduced and finally you get the next display of 4 thumbnails per row:


On an iPhone this album looks as follows:


Use the area on the sides of the thumbnails to shift the thumbnails up or down with your finger.

On an iPad it looks as follows:

Try it yourself by opening my Barcelona album with variable number of fixed-shape thumbnails per row. The selected thumbnail image size is in this example 1000x100.

This way of presentation is in particular very useful if you have an album with a very large number of pictures which you like to present in one galery. A good example of such an album is my Nepal album, where also filters are used to create nice borders.

If an album contains also folder albums, the thumbnail folder icons are now displayed in a second table of  thumbnail folder icons after the slide picture thumbnails of the top album. However it is the responsibility of the album creator that the folders are located after all normal images in the jAlbum Explore. 

As you can see in the screen-dump of the Index page settings above, you can select the border color of these  thumbnail folder icons.

Click here  for an example of an album with folders with a variable number of thumbnails per row and thumbnails of different sizes and click here for the same album with a gallery of variable thumbnails per row but now with fixed-shape thumbnails.

The new implementation did not use html table tags, only div tags combined with CSS3 media queries. It was based on the article of  Joshua Johnson How to build a Responsive Thumbnail , but in version 2.3.2 it is replaced by a design based on a table, as is also used in the Mirage skin of Chris Twist. This gives a nicer symmetrical thumbnail gallery which works fine on Android tablets, on the iPad and iPhone and on a PC with all browsers including Firefox and  Internet Explorer. 


The table design is in version 2.4.2 of the Slide Show 4 skin  replaced by a <div> structure which gives equal spaces between the thumbnails and the number of thumbnails per row depends on the available screenspace on a row.

In version 2.6 of the Slide Show 4 skin and in the PhotoSwipe skin is a new thumbnails design implemented. This design is implemented without <table> tags. The table is constructed of floating <div>s.

So we have now 3 types of thumbnails presentations:
  1. An elastic thumbnails table which uses <table> tags. Supported by all mobile devices but on a PC Firefox and Internet Explorer do not support the resizing of the thumbnails. For an example click here
  2. An elastic thumbnails table which does not use <table> tags. Supported in all browsers both on mobile devices and PCs. To see the same album in that design click here. To see an example with folders, see my Texel album
  3. A responsive design where the size of the thumbnails does not change, but the number of thumbnails per row may change if the window/screen size is different. Supported in all browsers both on mobile devices and PCs. To see the same album in this design click here
For method 1 and 2 fixed-shaped thumbnails are mostly used, but in method 3 I use most times thumbnails size 1000x100 wit check-box 'Fixed-shape thumbnails' cleared.

You can choose the type of thumbnails gallery on the Slide Show 4 Index page settings:


Choose type 3 gallery by setting the 'Variable number of thumbnails per row' check-box. If that check-box is cleared an elastic table is used for the gallery. If check-box 'Don't use <table> tags is cleared, the classical html table structure is used in gallery type 1
.

Click here  to download and install newest version of the Slide Show 4 skin and click here to open the Slide Show 4 skin manual.

19 september 2014

How to show panoramic pictures with the Slide Show 4 skin, the FancyBox skin or the PhotoSwipe skin?


Both the Slide Show 4 skin, the FancyBox skin and the PhotoSwipe skin makes it possible to expand slides of panoramic pictures:


If you click the gray expand button above this picture, the image is enlarged, so that the whole window height is filled by the picture:


You can scroll horizontally through the picture with the mouse on a PC or with your fingers on a tablet or mobile phone.

To try it yourself, open  my Terschelling album and click next the folder West-Terschelling and click there on the 25th thumbnail to open the panoramic picture shown above.
See also this album with only panoramic pictures.

Normally I use as image bounds for the slides HD quality 1920x1080. But this gives for panoramic pictures which are expanded to the screen height sometimes a bad quality image. So before I create the final version of an album, I open each panoramic image in jAlbum's Explorer next I click in the right panel on the triangle before Panoramic image select depending on the type of panorama the 'Spherical panoramic image' check-box or the 'Cylindrical panoramic image' check-box. In case you made a 360° cylindrical panorama, you should also select the '360° panorama'.

You should see a window like this:


Next clear check-box 'Progressive mode' on Album Setting / Images /Advanced:


If you don't do this, the panoramic pictures can't be displayed on an iPhone or iPad.

Next (re-) create the album by selecting 'Make All' (Shift+F9), all slides will be made in the defined default size (1920x1080 in my case), except the panoramic picture which has been edited. The height of the panoramic picture  is set to 1080 pixels; the width depends on the aspect ratio of the panoramic picture, but  if the width exceeds 30000 pixels, it is limited to 30000 and the height is made smaller as 1080 pixels. In the example above, the width is 6791 pixels.

I stitch my panorama photo's with program autopano pro or with Lightroom 6, which makes it also possible to generate 360° panoramas. As an example go to my West-Terschelling folder as indicated above and click on the 3th thumbnail. Next you see the whole compressed panoramic picture:


To expand it, click the 360Cities button and next the expand button in the right corner. The whole screen will be filled with your panorama and you can scroll through the panorama with the mouse or with your fingers.

If you stitch this with program autopano pro  it is imprtant that you see that the range in the detected panorama is 360°:


In the rigth panel you should see behind “FOV” 360.00

After you created the panorama you can upload it to the 360Cities site. Before you can do that you should create an account on 360Cities.

Once the panorama is uploaded and published, click on the View button in your profile of published images and copy the URL of the panorama to the clipboard.

Next open edit image window in jAlbum for the corresponding picture and click the Link arrow in the right panel:


Next past the URL of the panorama into the URL field of the link panel and check check-mark "Link to an external panorama picture page, ...".

Finally create the album.